Comparing Engineered Wood vs. Solid Hardwood for Your Moorestown, NJ Home
Blog Comparing Engineered Wood vs. Solid Hardwood for Your Moorestown, NJ Home Serving homeowners in Moorestown, NJ and surrounding areas Choosing between engineered wood and solid hardwood flooring for your Moorestown, NJ home involves understanding key differences in construction, durability, and how they perform in our local climate. While both offer the timeless beauty of natural wood, their underlying structures dictate where each option shines. For homeowners considering new flooring, the decision often comes down to balancing aesthetics, budget, and practical considerations like moisture resistance and maintenance. This guide will help you understand the pros and cons of engineered wood vs. solid hardwood, ensuring you make an informed choice for your home. Quick Answer: For Moorestown homes, engineered wood offers greater stability in fluctuating humidity and versatility for below-grade installations, while solid hardwood provides unmatched longevity and the ability to be refinished many times. The best choice depends on your specific installation area, budget, and long-term goals. Request a Quote Understanding the Core Differences: Engineered vs. Solid Hardwood At first glance, engineered wood and solid hardwood can look remarkably similar, both offering the natural beauty of wood grain. However, their construction is fundamentally different, leading to distinct advantages and disadvantages for each. Solid Hardwood: The Traditional Choice Solid hardwood flooring is exactly what it sounds like: a single, solid piece of wood, typically 3/4 inch thick. It’s renowned for its natural beauty, durability, and the ability to be sanded and refinished multiple times over its lifespan. Common species include oak, maple, and cherry. Composition: 100% solid wood from top to bottom. Installation: Usually nailed or stapled to a wood subfloor. Not recommended for below-grade (basement) installations due to moisture sensitivity. Refinishing: Can be sanded and refinished 5-7 times, extending its life for many decades, even over 100 years with proper care. Engineered Wood: Modern Versatility Engineered wood flooring is constructed with multiple layers. The top layer is a slice of real hardwood (the “veneer”), while the core layers are made of high-density fiberboard (HDF), plywood, or other composite materials. This layered construction provides enhanced stability. Composition: Real wood veneer on top, with a cross-ply or HDF core. Installation: Can be glued down, stapled, or floated over various subfloors, including concrete. Suitable for above-grade, on-grade, and some below-grade installations. Refinishing: Depends on the thickness of the top veneer. Thicker veneers can be refinished 1-3 times, while thinner ones might not be refinishable at all. Solid hardwood offers timeless appeal and exceptional longevity, often lasting over a century in homes. Performance in Moorestown, NJ’s Climate: Humidity & Stability Moorestown, NJ experiences seasonal humidity fluctuations, which can be a significant factor when choosing wood flooring. Wood is a hygroscopic material, meaning it absorbs and releases moisture, causing it to expand and contract. Solid Hardwood and Humidity Solid hardwood is more susceptible to moisture-related issues like cupping, crowning, and gapping if humidity levels aren’t consistently maintained. The National Wood Flooring Association (NWFA) recommends maintaining indoor relative humidity between 30% and 50% year-round for optimal performance. Without proper HVAC control, solid hardwood can react noticeably to Moorestown’s humid summers and dry winters. Engineered Wood and Humidity Engineered wood’s layered construction, with grain running in opposing directions, makes it far more stable and resistant to moisture-induced expansion and contraction. This makes it an excellent choice for areas prone to higher humidity or slight temperature variations, such as basements or concrete slabs in Moorestown homes. It can tolerate relative humidity levels between 35% and 65% more easily than solid wood. This enhanced stability is a major benefit for many homeowners. Local Insight: For basements or areas with known moisture concerns in Moorestown, engineered wood flooring is often the more practical and durable choice. Its construction provides greater dimensional stability against the challenges of local climate variations. *Pricing varies based on project scope, materials selected, and site conditions. Contact us for a personalized estimate. Durability, Lifespan, and Refinishing Potential The long-term value of your flooring investment heavily depends on its durability and how many times it can be renewed through refinishing. Solid Hardwood Longevity Solid hardwood is incredibly durable. With proper installation and care, it can last for 75 to 100 years or more. Its ability to be sanded and refinished multiple times means that scratches, dents, and wear can be completely removed, restoring the floor to like-new condition. Each sanding removes a small amount of wood, typically allowing for 5-7 refinishing cycles over its lifetime. This makes solid hardwood a generational investment. Engineered Wood Lifespan The lifespan of engineered wood largely depends on the thickness of its top veneer. High-quality engineered wood with a thick veneer (e.g., 4-6mm) can last 40-80 years and may be refinished 1-3 times. Engineered wood with thinner veneers (1-2mm) might not be refinishable at all, and its lifespan would be closer to 20-30 years, requiring replacement rather than restoration when worn. This is a critical factor for homeowners to consider. Refinishing solid hardwood floors can extend their life for decades, removing years of wear and tear. Cost Considerations for Your Moorestown Home When budgeting for new flooring, both material cost and installation cost need to be considered. Prices for engineered wood and solid hardwood can vary widely based on wood species, grade, finish, and brand. Material Costs Generally, the material cost for both engineered and solid hardwood can range from $3* to $15* per square foot, with exotic species or premium finishes pushing prices higher. Basic engineered wood might be slightly less expensive than basic solid hardwood, but high-end engineered products can easily match or exceed the cost of many solid hardwood options. Installation Costs Installation costs for both types of flooring typically range from $3* to $8* per square foot, depending on the complexity of the job, subfloor preparation, and local labor rates. Engineered wood can sometimes be quicker to install, especially if it’s a floating installation, which might slightly reduce labor costs. However, intricate glue-down installations for engineered wood can be just as labor-intensive as solid hardwood. *Pricing varies
Stair Installation & Refinishing: Boosting Your Glenside Home’s Value

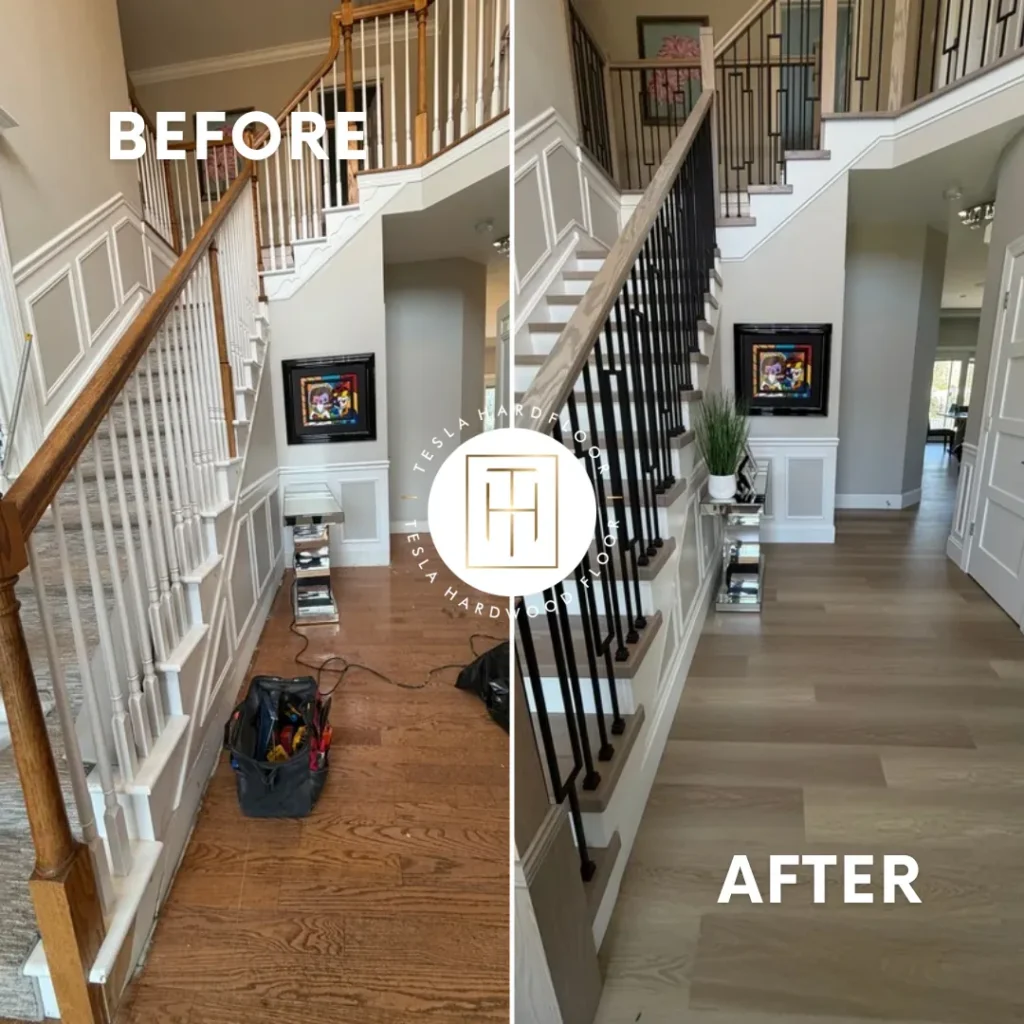
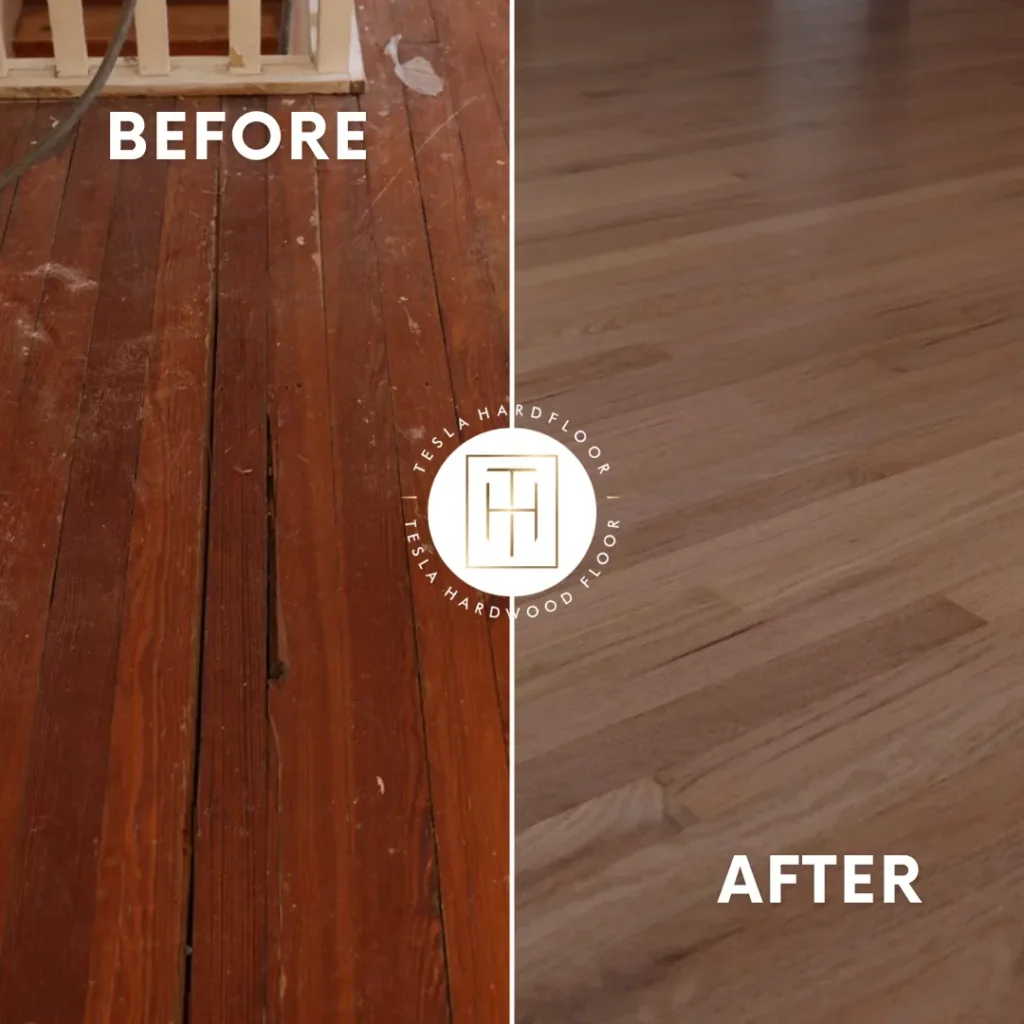
Blog Stair Installation & Refinishing: Boosting Your Glenside Home’s Value Serving homeowners in Glenside, PA and surrounding areas In Glenside, PA, your staircase isn’t just a functional element; it’s a central design feature that can significantly impact your home’s aesthetic and market value. Worn-out, carpeted, or outdated stairs can detract from an otherwise beautiful interior, while newly installed or expertly refinished stairs can transform a space. Whether you’re looking to replace an old, creaky set of stairs or breathe new life into existing ones, understanding the process of stair installation and refinishing is key. This guide will walk you through the benefits, considerations, and what to expect when investing in stair installation and refinishing in Glenside, PA. Ready to upgrade your Glenside staircase? Discover how professional stair installation or refinishing can enhance your home’s beauty and value. Request a Quote Why Invest in Stair Installation & Refinishing in Glenside, PA? Stairs are often high-traffic areas, enduring daily wear and tear. Over time, this can lead to scuffs, scratches, loose treads, or an overall dated appearance. Investing in professional stair installation or refinishing offers numerous advantages for your Glenside home. Enhanced Aesthetics and Curb Appeal A beautifully crafted or restored staircase immediately draws the eye, creating a strong first impression. New hardwood stairs can introduce a sense of elegance and continuity with your existing flooring, while refinishing can revive the natural beauty of the wood, making it look brand new. This visual upgrade contributes significantly to your home’s overall curb appeal and interior design harmony. Increased Home Value Hardwood floors, including stairs, are highly sought after by homebuyers. By upgrading your staircase, you’re not just improving your living space; you’re making a smart investment. Homes with well-maintained and attractive hardwood stairs often command higher resale values and spend less time on the market. It’s a tangible asset that adds lasting value. Improved Safety and Durability Old, worn, or poorly maintained stairs can pose safety hazards. Loose treads, splintered wood, or slippery surfaces can lead to falls. Professional installation ensures that all components are securely fastened and meet safety standards. Refinishing also addresses surface imperfections, creating a smoother, safer walking surface. High-quality finishes offer enhanced durability, protecting against future wear. Customization and Personalization Whether you opt for new stair installation or refinishing, you have the opportunity to customize your staircase to perfectly match your personal style and home decor. From selecting the type of wood and stain color to choosing baluster designs and newel posts, the possibilities are vast. This personalization ensures your staircase is a unique reflection of your taste. Modern stair installations, like these white oak stairs with iron balusters, significantly enhance a home’s interior design and value. Stair Installation in Glenside, PA: What to Consider Installing new stairs is a significant project that requires careful planning and execution. Here are some key factors to consider for your Glenside home. Material Selection The choice of material is crucial for both aesthetics and durability. Hardwood, such as oak (white or red), maple, or hickory, are popular choices for their beauty and longevity. Each wood type offers unique grain patterns and hardness levels. Consider how the new stairs will complement your existing hardwood flooring or other design elements. Staircase Design and Layout Beyond the material, the design of your staircase plays a huge role. Do you prefer a straight run, an L-shaped design, or a more elaborate curved staircase? Consider the space available, architectural style of your home, and functional needs. Balusters, railings, and newel posts also contribute significantly to the overall look. Professional Installation Stair installation is a complex task that requires precision and expertise. Proper measurements, structural integrity, and adherence to building codes are paramount for safety and longevity. Hiring experienced professionals ensures a flawless installation that will stand the test of time. A poorly installed staircase can be a safety hazard and a costly repair later on. *Pricing varies based on project scope, materials selected, and site conditions. Contact us for a personalized estimate. Stair Refinishing in Glenside, PA: Reviving Your Existing Stairs If your existing stairs are structurally sound but look tired and worn, refinishing is an excellent option to restore their former glory. This process can dramatically improve their appearance without the need for a full replacement. Assessment and Preparation The first step in stair refinishing is a thorough assessment of the existing wood. This includes identifying any damaged treads, risers, or railings that need repair or replacement. The surface is then meticulously cleaned, and any old finishes, paint, or carpet are removed. Proper preparation is essential for a smooth and lasting finish. Sanding and Staining Sanding is critical to remove scratches, dents, and old finishes, creating a smooth canvas for the new stain and finish. Professional-grade equipment ensures an even sand without damaging the wood. After sanding, you can choose from a wide range of hardwood floor stain colors to match your desired aesthetic. Whether you prefer a light, natural look or a rich, dark hue, staining can completely transform the appearance of your stairs. Finishing and Protection Once stained, multiple coats of a durable finish are applied to protect the wood and enhance its beauty. Options include polyurethane, water-based finishes, or oil-modified urethanes, each offering different levels of durability and sheen. A high-quality finish not only makes your stairs look great but also protects them from daily wear, spills, and UV damage, extending their lifespan. Consider exploring different hardwood floor finish types to find the best fit for your home. Refinishing can dramatically transform carpeted stairs into beautiful, natural wood, as shown in this before and after comparison. Choosing the Right Professionals for Your Glenside Project Whether you’re installing new stairs or refinishing existing ones, selecting the right flooring professionals is paramount. Look for a licensed and insured company with a proven track record of quality workmanship in Glenside, PA. Experience and Expertise Stair projects require specialized skills. An experienced team will understand the intricacies of different wood types, structural requirements, and finishing techniques.
Hardwood Floor Installation in Doylestown, PA: Tim’s Carpet-to-Golden-Oak Transformation
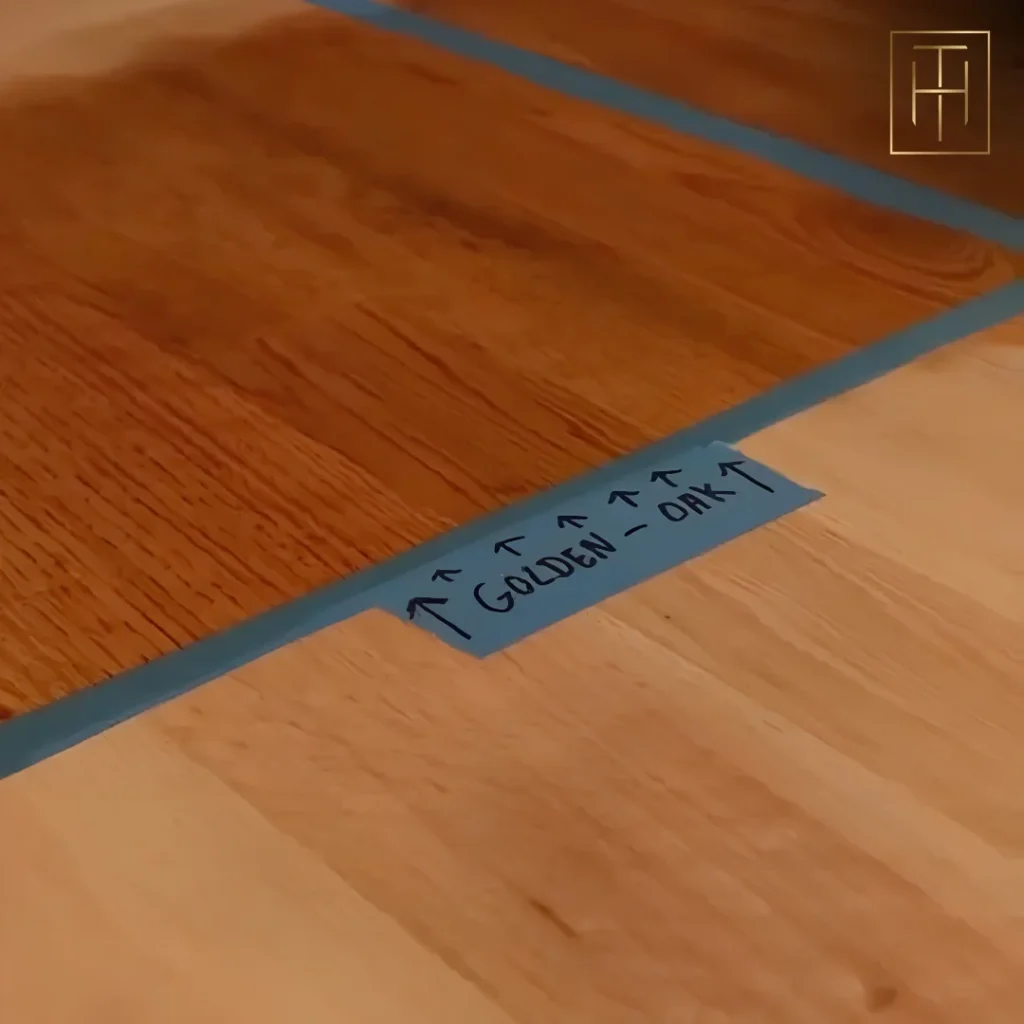
How Tesla Hardfloor turned Tim’s carpeted Doylestown living room into a warm Golden Oak solid hardwood floor, with a five-star client review.
Hardwood Floor Stain Colors Explained: Light vs Mid vs Dark for PA Homes

Blog Hardwood Floor Stain Colors Explained: Light vs Mid vs Dark for PA Homes Serving homeowners in West Chester and surrounding areas Choosing the perfect hardwood floor stain color for your Pennsylvania home is a big decision. It sets the tone for your entire interior, impacting everything from perceived room size to daily maintenance. With options ranging from light, airy tones to rich, dramatic darks, understanding the nuances of each can help you make an informed choice that you’ll love for years. This guide breaks down the most popular hardwood floor stain colors into three main tiers: light, mid-tone, and dark. We’ll explore how each impacts your home’s aesthetic, practical considerations like maintenance, and what’s currently trending in PA homes. Quick Answer: Hardwood stain colors fall into three tiers: light (natural, white-washed, pickled — popular 2020+), mid-tone (golden oak, classic walnut — dominant 90s/00s, returning), and dark (jacobean, ebony, espresso — peaked 2010–2018). For PA homes, light tones make small rooms feel bigger and hide dust; dark tones add drama but show every footprint and pet hair. Request a Quote Understanding Hardwood Floor Stain Colors When it comes to hardwood floor refinishing, selecting a stain is often the most exciting — and sometimes overwhelming — part. The right stain color can transform your space, enhancing the wood’s natural beauty and complementing your home’s decor. The wrong one can make a room feel smaller, darker, or dated. Let’s delve into the three primary categories of hardwood floor stain colors. Light Hardwood Floor Stain Colors Light stain colors have seen a significant resurgence in popularity, especially since 2020. These tones create an open, airy feel, making rooms appear larger and brighter. They’re particularly well-suited for smaller spaces or homes with less natural light. Popular options include: Natural: This option emphasizes the wood’s inherent color, offering a clean, timeless look. It often involves just a clear coat, letting the wood’s grain and character shine through. White-washed: A translucent white stain that lightens the wood while allowing the grain to remain visible. It’s perfect for a coastal, Scandinavian, or modern farmhouse aesthetic. Pickled: Similar to white-washed but often with a slightly more opaque finish, giving a soft, muted appearance. Gray: Ranging from light ash to deeper charcoal, gray stains offer a contemporary edge and can neutralize warm wood tones. Light stains are excellent at hiding dust and minor scratches, making them a practical choice for busy households. They also pair well with a wide range of wall colors and furniture styles. Light stains, like the natural finish on this red oak floor, can create a bright and expansive feel in open-concept living areas. Mid-Tone Hardwood Floor Stain Colors Mid-tone stains were the dominant choice throughout the 1990s and 2000s and are currently seeing a return to favor. These colors offer a classic, warm, and inviting feel without being too overwhelming or too stark. They provide a good balance between hiding imperfections and showing the wood’s natural depth. Golden Oak: A classic choice that brings out the warm, yellowish-orange undertones of oak. While once ubiquitous, updated versions offer a less intense golden hue. Special Walnut: A rich, warm brown with subtle reddish undertones. It’s a versatile choice that works well in traditional and transitional homes. Provincial: A medium brown with a touch of red, offering a rustic yet sophisticated look. Classic Gray: A deeper, more pronounced gray than its lighter counterparts, providing a modern and elegant foundation. Mid-tone stains are versatile and provide a comfortable, grounded feel to any room. They are often less demanding to maintain than very dark floors, striking a good balance for everyday living. Dark Hardwood Floor Stain Colors Dark stains were highly fashionable from 2010 to 2018, offering a dramatic, luxurious, and sophisticated aesthetic. These colors can make a bold statement and provide a strong contrast to lighter walls and furnishings. Jacobean: A very dark brown with hints of black, offering a rich, old-world charm. Dark Walnut: A deep, true brown that evokes a sense of timeless elegance. Ebony: Almost black, this stain delivers maximum drama and a sleek, contemporary look. Espresso: A very dark brown, often with subtle reddish undertones, creating a warm yet intense finish. While undeniably elegant, dark floors come with a significant maintenance caveat: they show every speck of dust, pet hair, and scratch much more readily than lighter floors. This means more frequent cleaning is typically required to maintain their pristine appearance. Mid-tone stains like this red oak provide a classic, warm backdrop that complements traditional architectural elements. How Stain Tone Interacts with Room Size and Natural Light The amount of natural light a room receives and its overall size are crucial factors when selecting your hardwood floor stain color. Small Rooms: Light stains are your best friend here. They reflect light, making smaller spaces feel more expansive and open. Dark stains in a small, poorly lit room can make it feel confined and cave-like. Large Rooms: You have more flexibility in larger rooms. Dark stains can add intimacy and warmth to a grand space, while light stains will emphasize its vastness. Natural Light: Rooms flooded with natural light can handle darker stains without feeling too heavy. Conversely, rooms with minimal natural light will benefit immensely from lighter stains that maximize brightness. Consider the direction your windows face. North-facing rooms tend to have cooler, indirect light, which can be warmed up with mid-tone or slightly darker stains. South-facing rooms get abundant, warm light, allowing for a wider range of choices, including cooler gray tones or rich darks. Maintenance Reality: Dark vs. Light Hardwood Floors This is where practicality often clashes with aesthetics. The truth is, dark hardwood floors are significantly more demanding to maintain than lighter ones. Dark Floors: They act like a magnifying glass for dust, pet hair, crumbs, and even minor scratches. You’ll find yourself sweeping and cleaning much more frequently to keep them looking pristine. Every footprint can also be quite visible. Light Floors: These are far more forgiving. Dust and
How to Match New Hardwood with Your Existing Floors
Blog How to Match New Hardwood with Your Existing Floors Serving homeowners in Doylestown and surrounding areas Extending a room or renovating a space often means you need to match new hardwood with existing floors. Achieving a seamless transition can seem daunting, but with the right approach, it’s entirely possible to make new planks blend perfectly with older ones. This guide will walk you through the essential steps, from identifying your current flooring to choosing between feathering in new planks or using a transition strip. We’ll explain why professionals recommend sanding the whole room and why trying to match prefinished planks is a common pitfall. For expert help with your hardwood flooring project in Doylestown, contact us today. Quick Answer: To match new hardwood with existing, identify three things first: species, plank width, and stain color. Buy planks from the same species and width, then sand and refinish the entire room (new + existing) together so the stain and finish look identical. Trying to match a stain on factory-finished planks is the most common failure mode. Request a Quote Achieving a Seamless Match: Your Step-by-Step Guide to Matching New Hardwood with Existing Floors The key to a successful hardwood floor match lies in precision and understanding the nuances of wood. It’s not just about getting the color right; it’s about the entire composition of the floor. Step 1: Identify Existing Species (White Oak, Red Oak, Maple, Hickory, etc.) The first and most critical step is to determine the wood species of your existing hardwood floors. Different species have unique grain patterns, hardness levels, and how they absorb stain. Common species include: Red Oak: Known for its prominent, open grain and reddish undertones. It takes stain well and is a very popular choice. White Oak: Features a subtler, tighter grain with more brown and gray tones. It’s often favored for modern looks and can be stained in a wide range of colors. Maple: A very dense wood with a fine, subdued grain. Maple can be challenging to stain evenly due to its density. Hickory: Offers a distinctive, often dramatic grain pattern and significant color variation, making it a rustic choice. If you’re unsure, a professional flooring expert can help you identify the species accurately. This ensures that the new planks will have the same foundational characteristics as your old ones. Identifying the wood species, such as red oak, is the first step to ensuring new hardwood planks will match your existing floors seamlessly. Step 2: Measure Plank Width and Thickness Once you know the species, the next crucial measurements are plank width and thickness. Even a slight difference can create an uneven look or feel. Width: Standard hardwood planks typically come in widths like 2.25″, 3.25″, 4″, or 5″. Measure several existing planks to get an accurate average. Thickness: Common thicknesses are 3/4″ for solid hardwood and various measurements for engineered wood. Matching thickness is vital for a flush installation. The goal is to find new planks that perfectly match these dimensions. If your existing floors are an unusual size, you might need custom-milled planks, which a specialized hardwood flooring contractor in Doylestown can assist with. Step 3: Decide – Feather-In or Transition Strip? You have two primary options for integrating new hardwood with existing: Feathering-In: This involves weaving the new planks into the existing floor, creating a continuous, seamless surface. It requires removing some of the old planks and carefully interlocking new ones. This method is ideal for open-concept spaces or room extensions where you want the floor to look like one continuous installation. It’s a more labor-intensive process but yields the best aesthetic result. Transition Strip: A transition strip is a piece of molding used to bridge the gap between two different flooring types or between two areas of the same flooring where a perfect match isn’t feasible or desired. This is a good option when joining two distinct rooms, or if the existing floor is significantly older or damaged, making feathering difficult. The choice depends on your aesthetic goals, budget, and the structural realities of your home. Professionals often recommend feathering for the most natural and high-end finish, especially for areas that will be visible as a single floor. Why Prefinished Planks Rarely Match (and What to Do Instead) Many homeowners consider using prefinished hardwood planks for new installations, hoping to match them with existing site-finished floors. However, this approach almost always leads to disappointment. Factory Finish ≠ Site-Applied Finish Prefinished hardwood planks come with a factory-applied finish, which is typically a highly durable, UV-cured aluminum oxide coating. This finish is applied in a controlled environment and results in a perfectly uniform, hard surface. Site-applied finishes, on the other hand, are typically oil-based or water-based polyurethanes applied by hand on your property. The difference in application method, coating type, and curing process means that a factory finish will look distinctly different from a site-applied finish, even if the stain color is theoretically the same. The sheen, depth, and way light reflects off the surface will vary significantly. Trying to match a new prefinished floor to an existing site-finished one is like trying to match paint colors from two different brands – it rarely works perfectly. During installation, it’s crucial to ensure new planks are the correct species and dimensions before any finishing is applied to match existing floors. The “Sand the Whole Room” Approach: Why Pros Recommend It For the most seamless and professional result when you need to match new hardwood with existing floors, flooring professionals almost universally recommend the “sand the whole room” approach. Achieving a Uniform Look This method involves installing the new, unfinished hardwood planks and then sanding both the new and existing portions of the floor down to bare wood. Once both sections are raw wood, they are stained and finished together. This ensures: Consistent Stain Absorption: Both new and old wood will absorb the stain in the same way, leading to a uniform color across the entire surface. Identical Finish: The
How Many Times Can You Refinish Hardwood Floors? A Realistic Guide

Blog How Many Times Can You Refinish Hardwood Floors? A Realistic Guide Serving homeowners in West Chester and surrounding areas Hardwood floors are an investment, and part of their enduring appeal is their ability to be restored to their original beauty through refinishing. But how many times can you actually refinish hardwood floors before they need to be replaced entirely? This is a common question for homeowners in West Chester, and the answer isn’t always straightforward. The number of times you can refinish your hardwood floors depends on several factors, primarily the type of flooring you have and the thickness of its wear layer. Understanding these details is crucial for making informed decisions about the longevity and maintenance of your floors. Let’s break down what you need to know to maximize your floor’s lifespan. Atomic Answer: Solid 3/4-inch hardwood floors can typically be refinished 5 to 7 times over their 80–100 year lifespan. Engineered floors with a 4mm+ wear layer handle 2–3 refinishes; thinner wear layers (2mm) tolerate just 1. The deciding factor is the depth above the tongue-and-groove — once you reach it, the floor must be replaced. Request a Quote The Tongue-and-Groove Rule: The Ultimate Limit to Refinishing The absolute limit for hardwood floor refinishing is dictated by the tongue-and-groove joint. This interlocking mechanism is what holds your floorboards together. When you refinish a hardwood floor, a thin layer of wood is sanded away from the surface. The goal is to remove scratches, dents, and the old finish, revealing fresh wood underneath. The critical point is that you can only sand down to the top of the tongue-and-groove joint. Once you sand past this point, the structural integrity of the floor can be compromised, leading to loose boards, gaps, and an uneven surface. This is why professional floor technicians are careful to remove only the necessary amount of wood. Think of it like sharpening a pencil: you can sharpen it many times, but eventually, you reach a point where there’s no more wood to sharpen without breaking the lead. For hardwood floors, reaching the tongue-and-groove means it’s time to consider replacement rather than another refinish. Refinishing removes surface imperfections, but the amount of sandable wood is finite, especially above the tongue-and-groove. Solid 3/4-inch Hardwood: The Longevity Champion Solid hardwood flooring, typically 3/4-inch thick, is the most forgiving when it comes to refinishing. Because it’s solid wood from top to bottom (above the tongue-and-groove), it offers the most material for sanding. Refinishes: A solid 3/4-inch hardwood floor can generally be refinished 5 to 7 times. Lifespan: With proper care and regular refinishing every 10–15 years (depending on wear), these floors can last 80 to 100 years, or even longer. Cost-effectiveness: While the initial investment might be higher, the ability to refinish solid hardwood multiple times makes it incredibly cost-effective over its long lifespan. It’s a key reason why many homeowners choose hardwood flooring. Each refinishing session removes approximately 1/32 to 1/16 of an inch of wood, depending on the depth of scratches and the sanding process. Given the substantial thickness of solid hardwood, this allows for many opportunities to renew its appearance. Engineered Hardwood: Wear Layer is Key Engineered hardwood floors are constructed with a plywood or high-density fiberboard core and a top layer of real hardwood veneer, known as the wear layer. The thickness of this wear layer is the sole determinant of how many times engineered hardwood can be refinished. For more on engineered wood, check out our guide on engineered wood flooring. 4mm or thicker wear layer: These premium engineered floors can typically be refinished 2 to 3 times. They offer a good balance of durability and refinishing potential, making them a popular choice. 2-3mm wear layer: Floors with this thickness usually tolerate 1 refinish, if done carefully by an experienced professional. Less than 2mm wear layer: These floors generally cannot be refinished. The wear layer is too thin, and sanding would quickly expose the core material. It’s important to know the wear layer thickness of your engineered hardwood when considering refinishing. If you’re unsure, a flooring professional can help you assess your options. Always consult with a licensed and insured flooring expert before proceeding with any refinishing project. During refinishing, the top layer is sanded to remove imperfections, a process that requires careful measurement to preserve the floor’s integrity. How to Measure Remaining Sandable Wood Unsure how much life is left in your hardwood floors? Here are a couple of methods to estimate the remaining sandable wood: The Penny Test (for Solid Hardwood) Find an inconspicuous area, like near a baseboard or under a rug. Take a penny and gently scrape the edge along the floor surface. If you can feel a distinct lip or groove where the penny edge catches, it indicates that there’s still a good amount of wood above the tongue-and-groove. This informal test provides a rough idea, but a professional assessment is always best for accuracy. Paperclip in the Seam (for Engineered Hardwood) For engineered floors, carefully insert a thin paperclip or business card into the seam between two boards. Gently push it down until it stops. The distance from the surface to where it stops is roughly the thickness of your wear layer. Compare this measurement to the guidelines above to determine if refinishing is a viable option. You can also consult resources like NWFA (National Wood Flooring Association) for industry standards on refinishing tolerance. For more detailed information on wear layer measurements, Floor Critics offers useful guides. When Refinishing is No Longer Possible (or Advisable) Even with the most durable hardwood floors, there comes a time when refinishing is no longer the best solution. Knowing these signs can help you decide if it’s time for a full replacement. Gouges Deeper Than the Wear Layer: If your floor has deep gouges or damage that extends below the sandable wear layer (especially in engineered wood), refinishing won’t fully repair the damage. While some deep scratches can disappear after sanding, others
How to Care for Newly Refinished Hardwood Floors (First 30 Days)
Blog How to Care for Newly Refinished Hardwood Floors (First 30 Days) Serving homeowners in West Chester and surrounding areas Congratulations on your newly refinished hardwood floors! The rich luster and smooth finish instantly elevate your home. However, the first 30 days after refinishing are crucial for the long-term durability and beauty of your investment. This period, known as the “curing phase,” is when the finish hardens to its maximum strength. Understanding how to properly care for newly refinished hardwood during this time will prevent common issues like scratches, dents, and premature wear. Follow this guide to ensure your floors look stunning for years to come. Atomic Answer: For the first 7 days after polyurethane refinishing, walk only in socks, don’t replace rugs, and don’t move furniture back. Full cure takes 21–30 days — only after that point can you put down area rugs, rolling chairs, or expose the floor to direct sunlight without yellowing risk. Request a Quote Understanding the Cure Timeline for Your Hardwood Floor Finish The “cure time” for your newly refinished hardwood floors isn’t the same as “dry time.” While your floors may feel dry to the touch within hours, the finish is still chemically reacting and hardening. This process can take weeks, depending on the type of finish used, humidity levels, and air circulation. Oil-Based Polyurethane Oil-based polyurethane is known for its rich, amber tone and excellent durability. However, it has the longest cure time. Dry to touch: 24 hours* Light foot traffic (socks only): 3–7 days* Furniture back: 7–10 days* Area rugs, heavy furniture, full cure: 21–30 days* *Pricing varies based on project scope, materials selected, and site conditions. Contact us for a personalized estimate. Water-Based Polyurethane Water-based polyurethane dries faster, is clearer, and has less odor. It’s a popular choice for those seeking a quicker return to normal use. Dry to touch: 2–4 hours* Light foot traffic (socks only): 24–48 hours* Furniture back: 3–5 days* Area rugs, heavy furniture, full cure: 14–21 days* *Pricing varies based on project scope, materials selected, and site conditions. Contact us for a personalized estimate. Hardwax Oil Finishes Hardwax oils penetrate the wood, creating a natural, matte finish that is repairable. They have a different curing process. Dry to touch: 8–12 hours* Light foot traffic (socks only): 24–48 hours* Furniture back: 3–5 days* Area rugs, heavy furniture, full cure: 7–14 days* *Pricing varies based on project scope, materials selected, and site conditions. Contact us for a personalized estimate. Always confirm the specific cure time with your hardwood floor refinishing professional, as product formulations and environmental factors can influence these timelines. For more information on polyurethane cure times, you can consult resources like Bona or the NWFA (National Wood Flooring Association). A close-up of a newly refinished pine hardwood floor in a West Chester, PA home, showcasing the intricate wood grain detail. Days 1–3: The Critical “Socks Only” Phase The first few days after refinishing are the most delicate. The finish is still very soft and susceptible to damage. Socks Only: Absolutely no shoes, pet claws, or bare feet (oils from skin can affect cure). Soft socks are your only footwear on the new floors. Zero Rugs: Do not place any area rugs, mats, or runners on the floor. This can trap moisture and prevent proper curing, leading to discoloration or uneven hardening. Light Walking: Limit foot traffic to essential movement only. Avoid dragging anything across the floor. No Furniture: Do not move any furniture back into the room. Even light items can leave permanent indentations. Ventilation: Keep windows slightly open or use fans to ensure good air circulation, which aids in the curing process. Think of your floors as a delicate painting – you wouldn’t touch it while it’s still wet! Patience now will save you headaches later. If you’re wondering how to prepare for this process, read our guide on preparing your home for refinishing. Days 4–7: Light Foot Traffic, Still No Furniture By this point, the finish has hardened enough for very light, careful foot traffic. However, it’s still not ready for the full weight of your home. Light Foot Traffic: You can walk on the floors more freely, but continue to wear socks. No Furniture or Heavy Objects: Resist the urge to move furniture back, even if it feels tempting. The finish needs more time to develop its full scratch and dent resistance. Keep it Clean: If dust accumulates, use a dry, soft microfiber mop. Avoid any liquid cleaners during this period. Pet and Child Control: Keep pets and young children off the newly finished areas as much as possible to prevent accidental scratches or spills. This phase is about continued patience. The finish is gaining strength, but it’s not at its peak. A newly refinished red oak hardwood floor in a dining room in Wayne, PA, ready for the next phase of careful curing. Days 8–21: Furniture Back with Felt Pads, Still No Rugs After about a week, you can carefully start returning furniture, but with critical precautions. Felt Pads are Essential: Before moving any furniture, attach high-quality felt pads to the bottom of all legs. This is non-negotiable for protecting your new finish. Lift, Don’t Drag: Always lift furniture when moving it, never drag. Even with felt pads, dragging can cause scratches or dents on a still-curing finish. No Area Rugs: Continue to avoid placing area rugs. The finish still needs to breathe and cure evenly. Trapping moisture or off-gassing under a rug can lead to problems. Avoid Rolling Chairs: If you have rolling office chairs, keep them off the hardwood for now, or use a clear chair mat specifically designed for hardwood floors. Sunlight Caution: For oil-based finishes, direct, intense sunlight can sometimes cause uneven curing or yellowing in the early stages. Consider using blinds or curtains during peak sun hours. This period is about reintroducing elements into the room while still being mindful of the finish’s ongoing maturation. For expert hardwood floor refinishing in West Chester, PA, trust a licensed
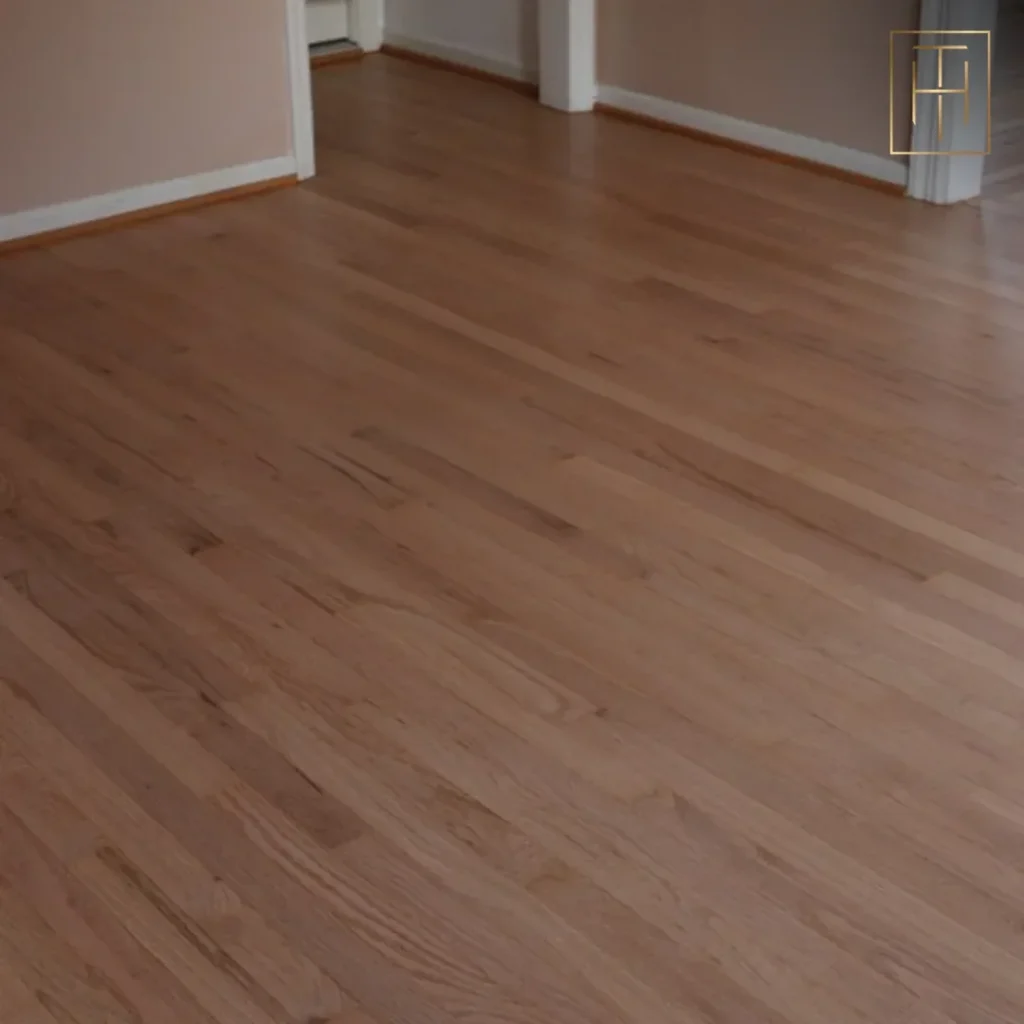
White Oak vs Red Oak Flooring: How to Choose the Right One for Your Home
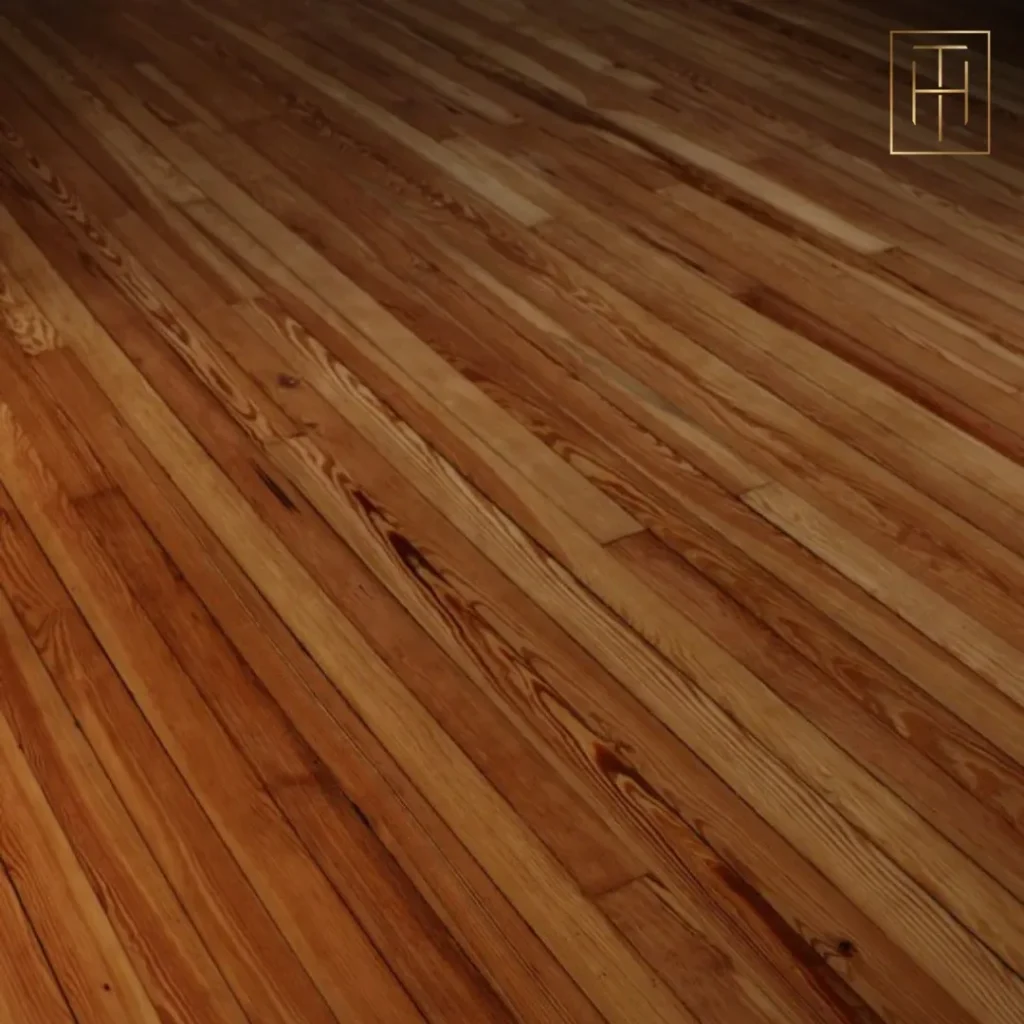
Hardwood Flooring Guide White Oak vs Red Oak Flooring: How to Choose the Right One for Your Home Serving homeowners in West Chester and surrounding areas Choosing between white oak and red oak is the number-one decision most homeowners face before buying hardwood floors. Both are beautiful. Both are durable. But they look very different on the floor — and they behave differently when you stain them. This guide breaks down exactly what sets them apart: hardness numbers, grain patterns, tone, stain performance, cost, and which one fits today’s PA home design trends. By the end, you’ll know which species is right for your project — and why. Quick answer: White oak has a tighter grain, cooler tone, and a Janka hardness of 1360 — making it the more popular choice for modern PA homes since 2018. Red oak has a wider, more dramatic grain with a pinkish undertone and a Janka rating of 1290. White oak takes gray and natural stains better; red oak shines with traditional warm tones. Request a Quote White Oak vs Red Oak Flooring: The Core Differences at a Glance Before diving into each factor, here’s a side-by-side comparison so you can see where the two species diverge most clearly. Factor White Oak Red Oak Janka Hardness 1,360 1,290 Grain Pattern Tight, subtle, uniform Open, dramatic, prominent Base Tone Cool tan / light beige Warm pink / amber Best Stain Colors Grays, whites, naturals, dark charcoal Amber, honey, cherry, medium brown Gray Stain Performance Excellent Poor (turns muddy or purple) Relative Cost ~10–15% premium over red oak* Baseline PA Design Trend (2020+) Dominant choice Still popular in traditional homes *Pricing varies based on project scope, materials selected, and site conditions. Contact us for a personalized estimate. Janka Hardness: What the Numbers Actually Mean for Your Floor The Janka hardness test measures how much force it takes to embed a steel ball halfway into a wood plank. It’s the industry standard for comparing how well a species resists dents, scratches, and everyday wear. According to the National Wood Flooring Association (NWFA) species guide, white oak scores 1,360 and red oak scores 1,290. That’s about a 5% difference — meaningful, but not dramatic. What 1,360 vs 1,290 means in real life In everyday use — kids, dogs, furniture legs, dropped items — both species hold up very well. Neither will dent under normal foot traffic. The gap becomes relevant in high-traffic commercial settings or homes with very large dogs and heavy furniture being moved frequently. White oak at 1,360: Slightly more resistant to surface scratches from pet nails and grit tracked in from outside. Red oak at 1,290: Still well above the threshold for residential use. Softer than white oak but harder than many popular species like pine or walnut. Both species: Can be refinished multiple times over decades, which matters far more than a 70-point Janka difference in most homes. Bottom line on hardness: If you have dogs or very active kids, white oak gives you a slight edge. For most households, both species will look great for 20+ years with proper finish maintenance. A refinished red oak floor in a Philadelphia living room. Notice the warm, pinkish undertone and the open, dramatic grain pattern — both defining characteristics of red oak that stain beautifully with amber and honey tones. Grain Pattern: Tight vs Open — Why It Changes Everything Grain pattern is one of the biggest visual differences between the two species. It affects how a floor looks from across the room, how it reads under different lighting, and — critically — how stain absorbs into the wood. White oak grain: tight and uniform White oak has a finer, tighter grain with less visible pore structure. The medullary rays (the fleck-like lines running across the grain) are more pronounced in white oak, especially in quarter-sawn cuts. This gives it a clean, almost modern look that reads as calm and sophisticated in large open spaces. The tight grain also means stain absorbs more evenly — which is why white oak handles gray, white-wash, and natural finishes so cleanly. There are fewer open pores to create blotchy spots or uneven color. Red oak grain: open and dramatic Red oak has a wider, more open grain with larger pores and a more pronounced pattern. From across the room, the grain reads as bold and characterful — it’s what most people picture when they think of “classic hardwood floors.” The open grain makes red oak excellent at absorbing warm stains like amber, honey, and cherry — the color soaks into the pores and creates rich, deep tones. But that same open grain is why gray stains almost never work on red oak: the pinkish undertone and open pore structure turn gray stains muddy, purple, or uneven. Design tip: If you want a floor that “disappears” into the room and lets your furniture do the talking, white oak’s subtle grain is your friend. If you want the floor itself to be a statement, red oak’s bold pattern delivers that energy. Tone Differences: Cool Tan vs Warm Pink — Which Fits Your Home? This is often the deciding factor for homeowners who are matching floors to existing paint colors, cabinetry, or furniture. The base tone of each species pulls in a completely different direction. White oak: cool, neutral, versatile Raw white oak reads as a light tan or beige — closer to the cool side of the spectrum. It has no pink in it. This neutrality is exactly why it pairs so well with modern design palettes: white walls, gray tones, black accents, natural linen, and Scandinavian-inspired interiors all work beautifully with white oak. It’s also why white oak became the go-to species for hardwood floor installation in new construction and renovation projects across Chester County and the Main Line starting around 2018. Designers and homeowners alike found it easier to build a whole-home palette around a neutral base. Red oak: warm, rich, traditional Raw red oak has a distinct
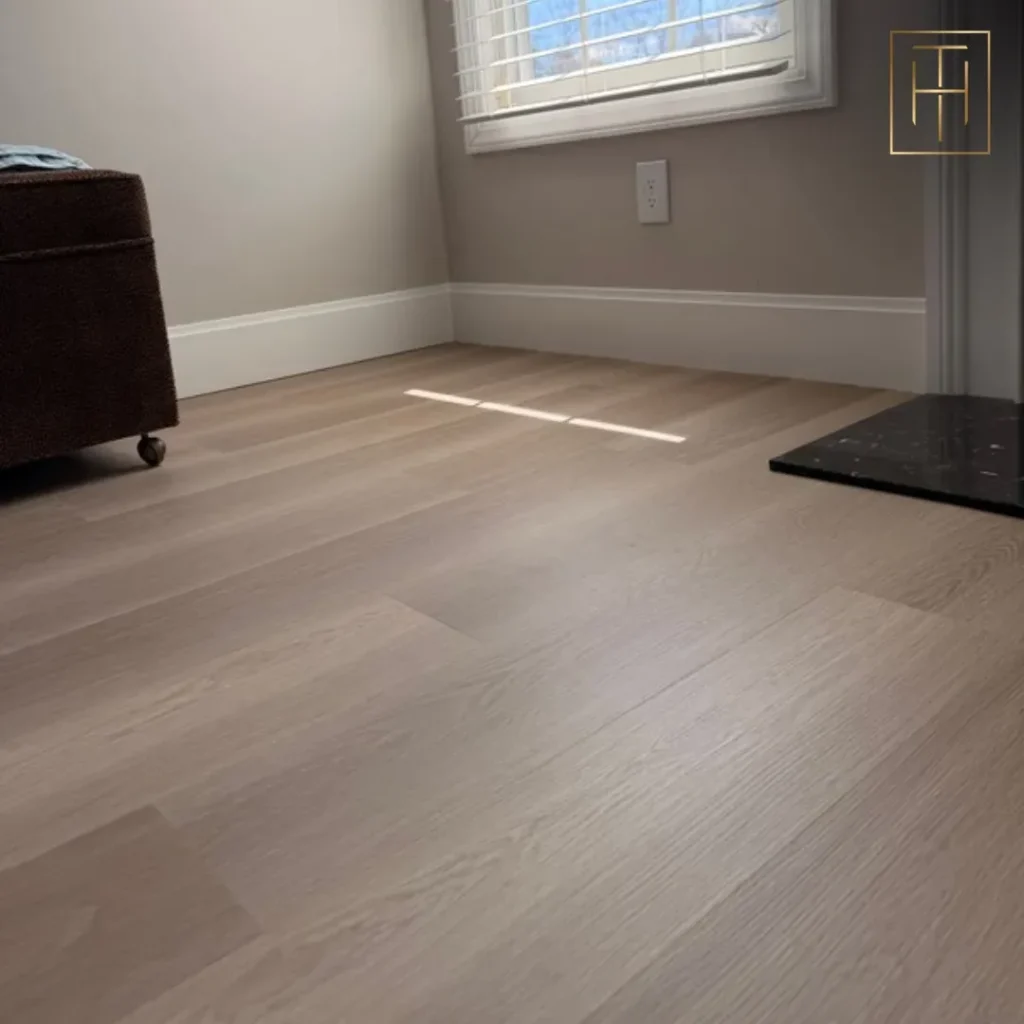
Solid vs Engineered Hardwood: Which Is Better for PA Homes (Including Basements)
Solid or engineered hardwood for your PA home? A flooring specialist breaks down humidity, basements, refinishing, and where each type actually wins.
How Long Does Hardwood Floor Refinishing Actually Take?
How long does hardwood floor refinishing actually take? A PA refinishing pro breaks down realistic timelines for 3 home sizes — and why rushing fails.